What Does It Mean When a Girl Looks at You From Head to Toe
Need some info on conducting a caput-to-toe assessment? Whether you are only looking for a quick head-to-toe assessment cheat canvass or a total guide to conducting a nursing head-to-toe assessment in a clinical setting, nosotros've got you lot covered! Nosotros'll start with a cursory overview of the assessment process, and then a quick head-to-toe cess checklist. After that, we'll practice a deep dive on all the cess steps, and wrap up with some example videos. A head-to-toe nursing cess is a comprehensive process that reviews the health of all major body systems (from "head-to-toe," hence the name). head-to-toe assessments are usually performed past nurses as part of a physical exam, although physician assistants, EMTs, and doctors too sometimes perform caput-to-toe assessments. Nurses and other clinicians may not perform a head-to-toe physical assessment for every single patient, depending on the setting they work in. They are typically a key function of primary care visits and annual physicals, simply less common when the patient presents with a specific complaint or event. In case you're just looking for a head-to-toe assessment cheat sheet, we've created a brief list here of the major things to cheque for. You lot can click on each of the body systems to be taken to a more in-depth description with instructions for that role of the head-to-toe cess. Or possibly you lot're looking for a nursing head-to-toe cess course that yous can print out and write on? We take that, also! Just click on this link for a PDF: Notation that different wellness systems (or professors, if you lot're a nursing student!) may have slightly different expectations for all of the specific tests you will perform as role of the head-to-toe assessment. While the below nursing caput-to-toe assessment cheat sheet tin function as a guide, exist sure to comply with the specifications of your place of work or school. Also notation that assessments for different sub-populations (like a pediatric head-to-toe assessment) may have different procedures. This is a general adult nursing head-to-toe assessment guide. And then this is not a guide to head-to-toe assessment for cats and dogs. Allow'due south go started! Here'southward our in-depth guide to conducting a head-to-toe cess, complete with explanations and linked videos. We'll start with some general principles to continue in mind throughout the assessment and then motility on to a more detailed expect at each of the tasks you'll need to consummate for each area/system of the body. Here are 4 general principles to keep in mind as you conduct your head-to-toe assessment. Think that head-to-toe assessment documentation is a critical part of the process. If you don't write down your findings, how will you remember them all to translate patient needs into a comprehensive care plan? Many people use nursing head-to-toe checklists or forms to make certain they remember everything and to document patient results. Be certain to communicate clearly with your patient throughout the assessment. Always ask before you start touching the patient, and explain what you lot are doing as you lot do it. Additionally, ask patient about how they have been feeling. They are the adept on their own body! The homo body is, in general, bilaterally symmetrical (i.e., the left side is the same every bit the right side). When you lot are examining a patient, brand note of any unusual asymmetry. If a patient is weaker on 1 side than another, or has express range of motion, or one side seems limper or otherwise different from the other side, in that location could exist an underlying neurological or musculoskeletal issue. The peel is a great barometer of overall health. Note if patient's skin seems unusually stake, flushed, cold, hot, damp, or dry out anywhere throughout the test. Also not any lesions, abrasions, or rashes. You might not take a barometer, only yous definitely take skin. The first things you'll want to bank check are patient vital signs and overall neurological status. Is patient warning and responsive? Enquire if they can tell you lot their proper noun, if they know where they are, and what twenty-four hour period information technology is. If yes, patient is "alert and oriented x 3." Take patient temperature and assess whether it is in the normal range. Record whether the temperature was taken orally, rectally, in the ear, at the forehead, or in the armpit as these methods accept differing accurateness levels. In professional settings, you may have an automatic claret force per unit area gage or you may need to take blood pressure manually. (As a student you'll likely need to demonstrate that you can take claret pressure manually). To measure blood pressure manually: Here's an in-depth guide to taking transmission blood pressure with a video. (There's a briefer video with all the vital signs beneath). When you measure out the heart rate, you'll count the beats per minute over a patient pulse betoken with two fingers (not the thumb, which has its ain pulse and tin can mess up the reading). You'll usually assess at the radial pulse (wrist) or the carotid pulse (neck). Normal developed BPM is about 60-100, although athletes can have lower heart rates. In a patient with a regular heartbeat, you can take the pulse for 30 seconds and just multiple by two, but if the beat seems irregular, get for at least a full minute. Respiratory rate is the number of breaths per minute, which you can tell from the rise and fall of the patient's chest. If you tell a patient you lot are assessing their breathing, they may actually alter their breath rate, so it'southward best to assess this surreptitiously after y'all take the pulse rate. 12 to twenty breaths per infinitesimal is the normal adult range. Here'southward a quick video guide to checking all the vital signs. This video includes oxygen saturation, which you may or may not need to appraise. You may too take patient'southward tiptop and weight every bit part of a head-to-toe assessment. Sadly, "number of puppies seen recently" is not a vital sign. These steps will have y'all cheque the overall condition of the head and face. Subsequent sections will exist devoted to the optics, olfactory organ, mouth, and ears. Is hair good for you? Evenly distributed? Is it thinning in places? Annotation whatever abnormalities, like unusual brittleness or uneven thinning. Role hair in several places on the scalp to cheque for bumps, sores, or scabs on the skin. Assess dryness and dandruff. As well check if at that place are lice or nits present in the hair. Palpate the skull to determine if there are whatsoever tender or sore areas. Have patient smile, frown, raise eyebrows, and puff out cheeks. If patient can move face at will, movements are symmetrical, and at that place are no involuntary movement, cranial nervus VII is intact. This test assesses the land of cranial nervus V. Hold a sterile, sharp object (like a needle or pin) in 1 hand and a soft item (like a cotton brawl or q-tip) in the other. Ask patient to close optics and place whether the sensation they are feeling is sharp or deadening. Gently bear upon the patient's face in different places with the sharp particular or the dull item, varying the order. His head doesn't look and so good to me. When checking patient eyes, you'll assess both patient vision and the wellness of the eye tissues similar the conjunctiva, sclera, and cornea. Verify that eyes are symmetrical, that the palpebral fissures are equal and in that location is no ptosis. Have patient glimmer; make sure that eyes shut completely Assess state of eyelashes and eyebrows; should exist symmetrical and evenly distributed. You can assess the conjunctiva past gently applying downward force per unit area to the skin below the patient's optics. Conjunctiva should be pinkish and costless of lesions. Unusually pale conjunctiva can exist a sign of anemia, and inflammation or infection can cause cherry conjunctiva. Gently agree patient lids open up and examine whites of the patient's optics (can exist done simultaneously while assessing conjunctiva). They should exist white in color with some capillaries visible. There may exist some spots of pigmentation but there should not be lesions or yellowness. You can examine the cornea by shining your penlight indirectly beyond the patient'due south eye (and so not directly into their eyes but shining from the side). This will illuminate the cornea, which should be polish and clear. The features of the iris should be clearly visible through the cornea. Additionally, patient should blink when cornea is touched gently with something sterile (the corneal reflex). PERRLA is an acronym that means that pupils are equal, circular, reactive to light and adaptation. This can exist tested with a penlight and assesses the state of cranial fretfulness 2 and 3. You should beginning look at the pupils to ensure that they are round and equal in size (PER). To check that they are reactive to light, dim the room and motility the penlight back and forth betwixt the optics. Both pupils should constrict equally in response to the calorie-free (directly and consensual response). To check that they conform, movement your finger (or the penlight) slowly closer to the patient's confront. The patient's pupils should constrict every bit the object comes closer. Hither is a how-to video for checking PERRLA. Hold your penlight or finger near one pes in front of patient's face. Ask them to follow the movements of your penlight or finger with their eyes only (without moving the head/neck). Move the penlight or finger out to the six cardinal positions of the gaze, moving back into the middle before proceeding to the next ane (similar you are cartoon out a compass rose). The patient should be able to hold their gaze at each of the six cardinal positions without any jerking (nystagmus). This test assesses the health of cranial fretfulness Three, Four, and VI. Ask patient to stand the appropriate distance away from the Snellen Chart. (Altitude from a standard chart is xx anxiety, but your health care setting may apply a special chart where the patient should stand a different distance abroad.) Take them first cover one middle and read the smallest row of letters that they can. Have them repeat with the other eye. If the patient wears glasses or contacts, examination both with and without vision correction and then you can assess the adequacy of the vision correction. Here's some info on interpreting Snellen Nautical chart results. If the eyes are the window to the soul, y'all'll be seeing a lot of souls. Every bit with the eyes, y'all'll assess both the health of the ear tissue and sensing part (i.east. hearing). Skin of the auricle (and backside) should be intact. Cartilage should exist firm with no tenderness on palpation. Auricles should be roughly symmetrical. Pull the pinna/auricle upwards and backwards to straighten the ear canal and examine the tympanic membrane in adults (pull down and back in children). Some xanthous or dark-brown cerumen (earwax) is normal. Tympanic membrane (eardrum) should be a translucent pearly grey color; note abnormal color or rupture. [moving picture of tympanic membrane from wikimedia commons] The Weber and Rinne tests both bank check for different kinds of hearing loss. For the Weber examination, strike the tuning fork and and then place the base of the fork on the centre of the patient's forehead. Sounds should exist equal in both ears. If sound is stronger in 1 ear or the other, indicates possible hearing loss. For the Rinne test, strike the tuning fork and place the base against the mastoid procedure. Start a stopwatch. Tell the patient to tell you when they stop hearing the sound of the tuning fork. When they stop hearing the audio, motility the tuning fork and so the forks are in front end of the ear (and note the fourth dimension on your stopwatch). Tell them to tell you lot when they terminate hearing the sound over again. Patient should hear the sound of the tuning fork through the air (in front of the air) 2x longer than through the bone. Repeat on the other ear. Stand up side by side to and a footling behind patient (near 2 feet away) then they cannot read your lips. Ask patient to cover opposite ear. Whisper a two-3 syllable give-and-take and inquire patient to repeat it back to y'all. Repeat with the other ear (and a different word!) Are yous ready to go out your trusty tuning fork? Yous'll be checking the nose both externally and internally. Gently palpate olfactory organ for whatever tenderness. Make sure olfactory organ is in midline and symmetrical. Excessive flaring of the nostrils may betoken respiratory distress. Employ penlight to illuminate septum to check that it is midline and non perforated. Smoothen penlight in each nostril. Cheque that membranes are pink and that at that place is no discharge or lesions. Turbinates should non be swollen. Have patient close one nostril with fingertip and exhale in and out through that nostril. Echo with other nostril. If patient cannot breathe through each naris, the nasal passage is occluded. Ask patient to shut eyes. Hold easily scented particular (like coffee beans, cinnamon, or fifty-fifty an alcohol-soaked cotton ball) under the nose and ask patient to identify smell. Gently palpate patient frontal and maxillary sinuses. Frontal sinuses are palpable over patient eyebrows. Maxillary sinuses are palpable on the cheek just outside the nares. Patient should not feel tenderness to force per unit area. "Ma'am, I'm going to have to ask you to remove your fingers from your nose then I tin examine it properly." Again, like the nose, you'll appraise the health of the oral cavity and throat both externally and past looking within. Lips should be colorful, pinkish, roughly symmetrical, and free of lesions. Very cracked or chapped lips could be a symptom of a number of issues, from dehydration to wind exposure to autoimmune conditions. Assess patient teeth for number (28 in children, 32 in adults), color, and alignment. Note any cavities or chips. Assess gums for bleeding, puffiness, or retraction (the pulling of the glue away from the molar, which can give teeth an "elongated" advent). Also note presence of halitosis; gum illness and oral infection are some of the most common causes of bad breath. The membranes of the rima oris and cheek should be pinkish, moist, and costless of lesions. Tongue should exist midline, pink with white gustatory modality buds, and free of lesions. Patient should exist able to motion tongue without difficulty. Patient uvula should be in the midline, pink or reddish in color, and costless of swelling or lesions. When the patients says "ah," uvula should move forrard and upwardly. (This tests cranial nerve X.) Depress natural language to inspect tonsils for inflammation, infection, swelling and tonsil stones. Infected tonsils are oftentimes reddish and puffy with white or yellowish patches. Palpate the jaw joint (the temporomandibular joint) while patient's oral fissure is closed, and then again while it is open up. Patient should be able to open up and close mouth without pain and there should be no pain on palpation. What plentiful mouths you have! In the neck and shoulders, yous'll primarily assess musculoskeletal function, but you lot'll also appraise the lymph nodes and a few other things. Ask patient to look upwardly, downward, left, and correct to assess that they have full range of move in the neck. Enquire if at that place is any pain (should be painless). Bank check Shoulder Shrug with Resistance Ask patient to shrug shoulders. Motility should be symmetrical and painless. Then, place hands on shoulders and ask patient to shrug again. Utilise resistance. Patient should still exist able to shrug with about equal force on each side. Using the first 2 or 3 fingers (using the flat pads as opposed to the fingertips), you'll palpate the following lymph nodes by moving the peel over the area in a circular motion: the occipital, posterior auricular, pre-auricular, sub-mandibular, sub-mental, anterior cervical chain, posterior cervical concatenation, and the supraclavicular lymph nodes. You may also wish to palpate the axillary lymph nodes, nether the arms. Here is a video of lymph node palpation. Palpate neck to feel for whatsoever lumps, deviations, or tenderness in the neck, specially the trachea expanse. Yous may also wish to palpate the thyroid, which requires a glass of water and tin be washed from the front (inductive approach) or backside (posterior arroyo). Jugular Venous Amplification refers simply to an abnormally full or bulging jugular vein in the neck. Information technology can be a sign of serious heart disease. To assess JVD, y'all'll want to lay the patient down with the head of the infirmary bed at a 45-caste angle. If you can see the bulging jugular vein in the side of the neck, the patient has JVD. Here's a video then you tin meet what JVD looks like and how information technology is diagnosed. It would take a long time to palpate a giraffe neck. When examining the chest area, you'll primarily be assessing respiratory function. You'll exist listening to the lungs up and downwards each lung, front and dorsum, with your stethoscope to appraise for any irregular breathing sounds. Here's an in-depth video guide to lung auscultation likewise as a guide to regular and irregular lung sounds. To assess respiratory expansion, place your hands on the patient'due south mid-back with thumbs at midline. Ask them to take a deep breath. Both sides of the chest should expand as with breath. Palpate the thorax for any areas of tenderness, lumps, asymmetry, lesions, etc. Spine should appear vertical when viewed from the back (with no scoliosis). Should exhibit normal curvature from the side. Ask patient if they are experiencing any coughing or other respiratory problems. If they are coughing, is information technology a dry out coughing or a wet cough? Lungs or alien heads? Y'all decide! Assessing the circulatory system is something you lot'll actually be doing throughout the test as you assess diverse pulses. simply as you are assessing the chest, y'all'll desire to examine the heart. Using index and middle fingers, experience the carotid pulse (at the side of the neck) and the temporal pulse (at the temple). Since you lot already checked pulse rate, you don't need to listen for a whole minute; only verify that the pulse is palpable and regular in rhythm. You'll need to listen to the patient's heart in iv places with your stethoscope: the aortic valve, the pulmonic valve, the tricuspid valve, and the mitral valve. You'll be listening for any irregularities in rhythm or irregular sounds during valve closures. Here's an in-depth video describing how to detect and listen to all of these valves, an overview of heart sounds, and a short video showing how to apprehend the center if you just need a quick refresher. These hearts don't circulate claret very well. You'll assess the gastrointestinal system by examining the abdomen and asking the patient questions. Audit patient abdomen for whatsoever visible lumps, lesions, or distension or concavity. Visually dividing the belly into four quadrants with the umbilicus as the midline, mind to bowel sounds in each quadrant. Estimate if sounds are hypoactive, hyperactive, or absent. If you practise hear sounds, you may only demand to listen for several seconds in each quadrant. Yet, yous should listen to each quadrant for five minutes before yous determine that there are no bowel sounds. Hither's a video. After you mind to the sounds, palpate the iv quadrants of the abdomen for whatsoever hurting, tenderness, or lumps with your fingers. Here'south a video showing how to do it. Ask patient when their terminal bowel movement was. Also inquire if appetite, bowel movements, and urination have been normal. Aren't you glad that humans don't actually have transparent skin? In the extremities, yous'll assess musculoskeletal function, sensory function, circulation, and tissue perfusion. Have patient demonstrate range of motion in arms and hands. They should exist able to roll shoulders, show flexion and extension of the elbow joint, circle the hands effectually the wrist joint, and demonstrate full flexion and extension of the wrist without pain. Also have patient clasp button confronting your hands, pull your easily towards them, and squeeze your fingers to assess strength, which should exist equal bilaterally. Here's a video showing this process. There are two major pulses in the arms: the radial pulse (at the wrist) and the brachial pulse (in the inner elbow). If you already checked the radial and brachial pulses while yous were taking vitals, yous tin can skip this step. It's most important to check that the pulses are palpable and regular in rhythm. To bank check tissue perfusion, pinch one of the patient's fingertips, applying force per unit area to the nail. When you release the fingertip, the nail bed should return to a normal color inside 3 seconds. On the dorsum of the paw or forearm, pinch skin. Information technology should immediately snap back to position upon release without "tenting" (remaining pinched upright). Tenting indicates dehydration or fluid volume deficit (link). However, note that this is not an effective test of skin turgor on elderly patients, as lower skin elasticity means their skin frequently tents regardless of their fluid levels! Take your sterile, precipitous object (similar a needle or pivot) in 1 hand and your soft item (like a cotton ball or q-tip) in the other. Ask patient to close eyes and identify whether the sensation they are feeling is sharp or wearisome. Gently impact the patient's arms in unlike places with the sharp item or the dull item, varying the society. The hands are fine, but where'south the rest of y'all? Y'all'll perform most of the same examinations on the lower extremities that y'all did on the upper extremities. Y'all should test range of motion of the lower extremities with the patient lying down. Patient should be able to flex and extend the ankle joint, and circumvolve the foot. Patient should also be able to bend the knee so move leg outward (to test hip ROM) on each side. There should be no pain. To appraise forcefulness, patient should push confronting your hands on the top of their anxiety, push down confronting your hands on the bottom of your feet, and push up against your hand on their shin. Force should be equal bilaterally. Here's a video of these tests (she starts with strength and so tests ROM). Perform the cap refill test on one of the patient's toenails. Later applying pressure level, the patient's nail bed should return to a normal color by 3 seconds. There are iv major pulse points on the legs and feet: femoral (hip/groin), popliteal (behind knee), posterior tibial (ankle) and dorsalis pedis (top of foot). Palpate the pulses of the legs and feet with your center ii or three fingers (non the pollex, which has its own pulse!) As you've already taken the pulse rate at this signal, it's not necessarily the charge per unit that's critical here only the regularity and strength of the pulse. Pulse should exist palpable and regular. Echo the sharp and boring awareness examination on the patient'south legs. Take your sterile, sharp object and your soft detail. Inquire patient to close optics and place whether the sensation they are feeling is sharp or dull. Gently touch the patient's legs in different places with the abrupt item or the dull detail, varying the order. Observe patient gait (can be done when patient gets upward to complete Snellen chart). Should be symmetrical, regular, and balanced. I bet they take complete range of motion and force in their lower extremities. You may non always perform a genitourinary exam as function of a head-to-toe assessment. Even so, if y'all exercise, here are the chief things you'll be checking for: Assess for presence of lice or nits in pubic pilus. Check for whatever unusual tenderness, lumps, or lesions on the external ballocks. For men, this will involve lightly palpating the penis and testicles. Y'all may or may not need to perform a breast examination in your head-to-toe assessment—sometimes it's advised to just perform them on symptomatic men or older women. Notwithstanding, hither's an in-depth guide to palpating the breast and feeling for unusual lumps. I virtually made a melon joke, simply then I decided information technology was depression-hanging fruit. So you tin can become an idea of how the entire process plays out in real time (and besides how it may vary from establishment to establishment), nosotros've gathered a few videos that are useful head-to-toe assessment examples. If you lot're looking for more examples, y'all can find lots of example videos of student assessments on Youtube (merely type in "caput-to-toe cess nursing"). Still, be aware that every student is going off of a dissimilar professor's rubric, and not everything may be 100% correct! This case video shows a nursing student performing an efficient but thorough sample assessment. This head-to-toe cess video shows a particularly detailed cess process performed by a nursing educatee. This video is particularly helpful considering the student clearly describes what each step indicates about body function. This caput-to-toe nursing assessment video is useful considering information technology presents the cess in a realistic-seeming care setting with a patient who asks questions. Information technology also shows the nurse request questions almost the patient'southward life quality, and closely explaining every step of the assessment so that the patient knows what's happening. We fabricated it all the way from head to toe! Fourth dimension for a nap. In this guide to the head-to-toe physical assessment, we provided the resources yous need to complete a comprehensive head-to-toe nursing assessment! Nosotros have a nursing head-to-toe assessment form for yous to use equally a guide besides every bit in-depth guidance to every stride of the assessment procedure. Nosotros also included several head-to-toe cess videos so y'all can come across the whole procedure in action! If you're looking for more information on clinical care, nosotros have guides to making intendance plans for decreased cardiac output and fluid volume deficit. We have a complete list of ICD-10 codes for diabetes and for abdominal pain. Want more information about eye positioning? Or about claret pressure readings? We've got you covered. Considering going into healthcare administration instead? Nosotros take a listing of the top programs and what degrees you'll need for which jobs in this commodity.
What Is a Head-to-Toe Assessment?
Quick Head-to-Toe Assessment Checklist

Assessment Tools
Vital Signs, Stats, and Neurological Indicators
Head/Face
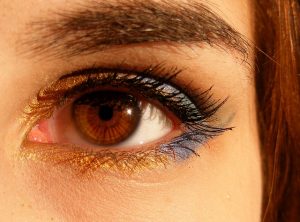
Eyes
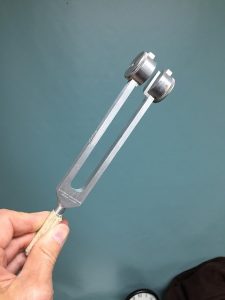
Ears
Olfactory organ
Mouth and Throat
Neck and Shoulders
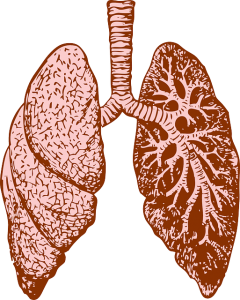
Lungs and Thorax
Circulatory Organisation
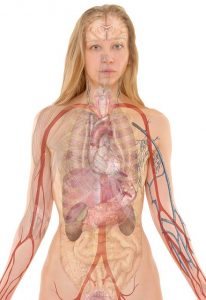
Gastrointestinal System
Artillery and Hands
Legs and Feet
Genitourinary Exam
Breast Test

In-Depth Guide to Conducting a Head-to-Toe Assessment
4 General Principles for Head-to-Toe Nursing Assessments
#one: Documentation Is Important
#2: Communicate Throughout
#3: Proceed an Middle on Bilateral Symmetry
#4: Assess Peel Throughout
Step i: Check Vital Signs and Neurological Indicators
Oriented 10 3
Appraise Temperature
Measure Blood Pressure
Assess Heart Charge per unit
Assess Respiratory Rate
Peak and Weight

Step 2: Examine Head and Face
Check Distribution and Condition of Hair
Check Scalp for Bumps, Nits, Lesions, Etc.
Palpate Skull for Tenderness
Cheque for Symmetrical Facial Movements
Assess Abrupt and Slow Sensation on Face
Pace 3: Inspect Optics
Assess Symmetry
Eyebrow and Eyelash Distribution
Bank check State of Conjunctiva
Bank check Sclera
Appraise Country of Patient'due south Corneas
PERRLA
Cheque Vi Cardinal Positions of the Gaze
Appraise Patient Vision with Snellen Nautical chart
Step 4: Evaluate Ears
Inspect and Palpate Auricle for Lesions, Tenderness
Look Within Ear; Assess Ear Discharge and Tympanic Membrane
Tuning Fork Tests (Weber's Test, Rinne Test)
Assess Patient Hearing with Whisper Test
Step 5: Cheque Olfactory organ
Palpate Nose and Assess Symmetry
Check Septum
Bank check Inside Nostrils
Verify Patency of Nares
Verify Patient Sense of Smell is Intact
Palpate Sinuses

Step 6: Probe Oral cavity and Throat
Moistness and Color of Lips
Audit Teeth and Gums
Appraise Buccal Mucosa and Palate
Examine Tongue
Look at Uvula
Look at Tonsils
Palpate Jaw Joint

Step 7: Examine Neck and Shoulders
Check Neck Range of Motion
Palpate Lymph Nodes of the Head, Face, and Neck (and Under the Arms)
Observe/Palpate Trachea and Neck
Check for JVD

Step 8: Assess Lungs and Thorax
Mind to Lung Sounds Front and Back
Appraise Respiratory Expansion Level
Palpate thorax
Assess Spinal Curvature
Ask Well-nigh Coughing, Respiratory Issues
Pace nine: Check Circulatory Organization Function
Palpate the Carotid and Temporal Pulses Bilaterally
Listen to Heartbeat and Heart Valves

Pace 9: Review Gastrointestinal System
Inspect Abdomen
Listen to 4 Quadrants of Abdomen for Bowel Sounds
Palpate 4 Quadrants of Abdomen for Pain/Tenderness
Ask About Problems With Bowel or Bladder
Step 10: Inspect Artillery and Hands
Appraise Range of Movement and Strength in Arms
Bank check All Pulses in Arms
Cap Refill Examination on Fingernails
Check Peel Turgor
Appraise Sharp and Ho-hum Sensation on Artillery
Step 11: Examine Legs and Feet
Assess Range of Motion and Strength in Legs and Ankles
Check Cap Refill on Toenails
Check Pulses of Legs and Feet
Assess Sharp and Deadening Sensation on Legs
Assess Gait

Optional Step one: Complete Genitourinary Examination
Cheque Pubic Hair for Lice and Nits
Check for Tenderness, Lumps, Lesions
Optional Stride two: Perform Breast Examination

Head-to-Toe Assessment Video Examples
Student Head-to-Toe Assessment Example
Florida Country Higher at Jacksonville Student Example
Capital Community College Cess

Review: Completing a Head-to-Toe Assessment
What'south Next?

Ellen has extensive pedagogy mentorship experience and is deeply committed to helping students succeed in all areas of life. She received a BA from Harvard in Folklore and Mythology and is currently pursuing graduate studies at Columbia University.
Source: https://blog.prepscholar.com/head-to-toe-assessment-checklist
0 Response to "What Does It Mean When a Girl Looks at You From Head to Toe"
Post a Comment